Chapter 2: Project Structure"
| Line 26: | Line 26: | ||
= Project Structure= | = Project Structure= | ||
| + | |||
| + | [[File:Tutorial-project-structure.png | center ]] | ||
| + | |||
* package folder | * package folder | ||
* ZUL | * ZUL | ||
* readme.txt | * readme.txt | ||
| − | |||
= References = | = References = | ||
<references/> | <references/> | ||
Revision as of 07:38, 8 January 2013
Source Code
3 branches All source code used in this tutorial is available on [github]. Because our example application has 3 different configurations, our source code is divided into 3 branches: master, chapter 9, and chapter 10.
The mater branch contains the examples from chapter 3 to chapter 8. The other two branches contains examples of the chapter which their branch name indicate.
You can click the "ZIP" icon to download the current selected branch as a zip file.
Run Example Application
After you download the source code, you will find it is a Maven[1] project with jetty plugin configured. Therefore, if you have Maven, you can run the example application with a simple command[2] :
mvn jetty:run
Then visit the URL http://localhost:8080/tutorial/index.zul (Assume the source code's folder name is "tutorial".), and you should see the screen below.
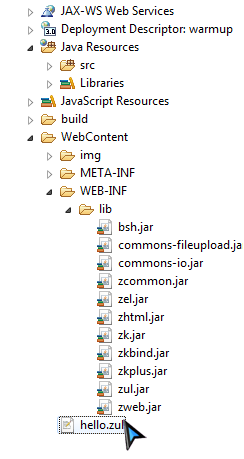
Project Structure
- package folder
- ZUL
- readme.txt
