Create and Run Your First ZK Application with Eclipse and ZK Studio"
From Documentation
| Line 35: | Line 35: | ||
==Running the ZUL file== | ==Running the ZUL file== | ||
:1. Right click on the '''MyApp''' project in explorer and in the Menu dialog select '''Run As > Run on Server''' | :1. Right click on the '''MyApp''' project in explorer and in the Menu dialog select '''Run As > Run on Server''' | ||
| − | [[Image:runonserver.png | + | [[Image:runonserver.png]] |
:2. Select '''Apache > Tomcat v6.0 Server''' in server type dialog and then click '''Finish''' | :2. Select '''Apache > Tomcat v6.0 Server''' in server type dialog and then click '''Finish''' | ||
| − | [[Image:runOnTomcat.png | + | [[Image:runOnTomcat.png]] |
:3. See the result in your browser. | :3. See the result in your browser. | ||
| − | [[Image:indexZULinBrowser.png | + | [[Image:indexZULinBrowser.png]] |
=Version History= | =Version History= | ||
Revision as of 10:54, 17 September 2010
ZK Studio is an Eclipse plugin to simplify the development of ZK applications with Eclispe.
Install Eclipse
- Download Eclipse IDE for Java EE Developers
- Uncompress it to a proper directory
Install ZK Studio
Follow ZK Studio Installation Guide to install ZK Studio.
Creating a "Hello World" application from scratch with ZK Sutdio
Creating a new "ZK Project"
With the release of ZK Studio you no longer have to create a new Dynamic Web Project and configure the settings for ZK! You can create a new ZK Project, choose your ZK Package and sit back while ZK Studio does the rest for you.
The following swf demonstrates how to create a new ZK project using Eclipse 3.4 and ZK Studio:
For detailed steps, please refer to Create a New ZK Project
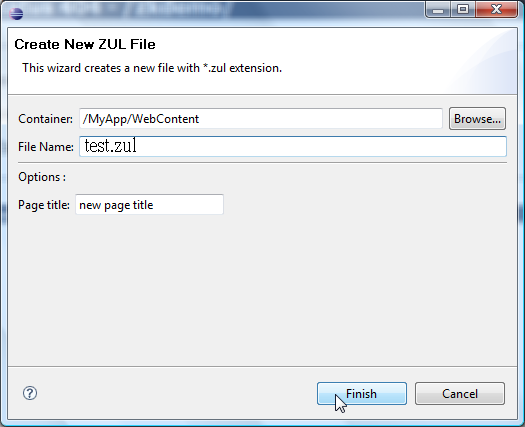
Creating a new ZUL file
- 1. Right click on the WebContent folder in the Project Explorer view or the Package Explorer view and select New > ZUL.
- 2. Type index.zul in the File name textbox and click Finish.
- 3. The newly created ZUL File will be opened in the ZUL Editor.
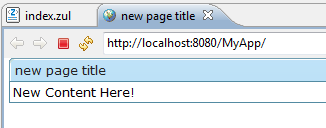
Running the ZUL file
- 1. Right click on the MyApp project in explorer and in the Menu dialog select Run As > Run on Server
- 2. Select Apache > Tomcat v6.0 Server in server type dialog and then click Finish
- 3. See the result in your browser.
Version History
| Version | Date | Content |
|---|---|---|


