Gmaps
![]() This documentation is for an older version of ZK. For the latest one, please click here.
This documentation is for an older version of ZK. For the latest one, please click here.
Google Maps is quite useful for those applications that need to locate an address or position. Besides ping point a specific position on earth, some application also use such component to show the vehicle route and other things. ZK has integrated the Google Maps into a gmaps ZK component, so ZK application developers can now use this originally a javascript component with pure Java code. This article is mainly on how to use this new component and what function has been integrated.
Installation
- To use this gmaps component, you have to first copy the gmapsz.jar under zkforge folder to $TOMCAT_HOME/$Your_Project/WEB-INF/lib.
- Sign up for the Google Maps API
The "Hello, World" of Google Maps
Here is the example to write the same "Hello, World" of Google Maps.
<zk>
<script type="text/javascript" src="http://maps.google.com/maps?file=api&v=2&key=ABQIAAAAmGxmYR57XDAbAumS9tV5fxTwM0brOpm-All5BF6PoaKBxRWWERSynObNOWSyMNmLGAMZAO1WkDUubA"/>
<gmaps width="500px" height="300px"/>
</zk>
The <script> references the same source of Google Maps API and all the other lines are wrapped into this gmaps component and you can control it by pure Java codes as other ZK components. Simply replace the key in <script> if necessary.
The ZK team initializes the default latitude and longitude of the gmaps component to (37.4419, -122.1419), the Google's home. And you can of course change this by giving the gmaps component the new latitude(lat) and longitude(lng).
Following is an example that set maps center to, say (37.7765, -122.4140). Yes, it is San Francisco.
<gmaps width="500px" height="300px" lat="37.7765" lng="-122.4140"/>
Map Movement and Animation
To move the Maps center smoothly, you can control it by calling Gmap.panTo() Java method as follows,
<zk>
<gmaps id="map" width="500px" height="300px"/>
<button label="panTo" onClick="map.panTo(37.4569, -122.1569)"/>
</zk>
Press the pantTo button and you should see the Maps slides to its northern-west side.
Change the Zoom Level From Program
The zoom level of the gmaps can be changed by program, too.
<zk>
<gmaps id="map" width="500px" height="300px"/>
<slider maxpos="17" curpos="${map.zoom}" onScroll="map.setZoom(self.curpos)"/>
</zk>
sliding the bar and change the gmaps zoom level.
Adding Controls to the Map
The gmaps component also supports the three build-in controls, the GLargeMapControl, the GSmallMapControlG, and GMapTypeControl. You can control their visiblity by setting related attributes showLargeCtrl, showSmallCtrl, and showTypeCtrl, repectively.
<gmaps width="500px" height="300px" showSmallCtrl="true"/>
The Google Maps with a small control on the side.
onMapMove Event
Besides controlling the behavior and size of the Google Maps view, listen to the Google Maps events is as important. The following example handles the onMapMove event(the "moveend" Javascript event) and show the new latitude and longitude of the new Maps center on the label.
<zk>
<gmaps id="map" width="500px" height="300px" showSmallCtrl="true">
    <attribute name="onMapMove">
    	center.setValue(""+self.lat+","+self.lng);
    </attribute>
</gmaps>
<label id="center" value="${map.lat},${map.lng}"/>
</zk>
Drag the map to a new location and see the latitude and longitude changes.
The following example shows how to handles the onMapZoom event and see what the current zoom level is.
<zk>
<gmaps id="map" width="500px" height="300px" showSmallCtrl="true">
    <attribute name="onMapZoom">
    	zoom.setCurpos(self.zoom);
    </attribute>
</gmaps>
<slider id="zoom" maxpos="17" curpos="${map.zoom}" onScroll="map.setZoom(self.curpos)"/>
</zk>
Press the zoom + , - button on the Small Control to see the slider bar moving.
Ginfo
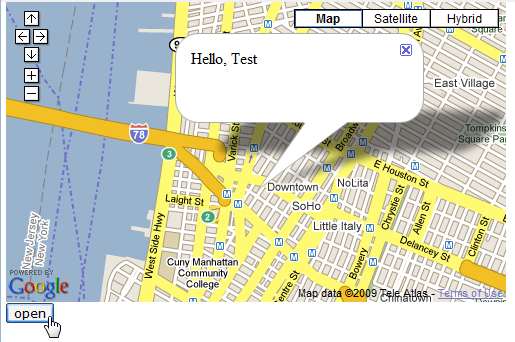
Ginfo allows you to show more information about a location on Google Maps, simply specify its location and embed it into gmaps component as follows,
<gmaps width="500px" height="300px"
showSmallCtrl="true"
showTypeCtrl="true" zoom="14"
lat="40.72254287" lng="-74.003777504">

<ginfo id="myinfo" lat="40.72254287" lng="-74.003777504">
    <attribute name="content">
        Hello, Test
    </attribute>
</ginfo>

</gmaps>
<button label="open" onClick="myinfo.setOpen(true)"/>

You can open it by change open property to true. One thing to notice is that only one ginfo is allowed in a gmaps.
Gmaker
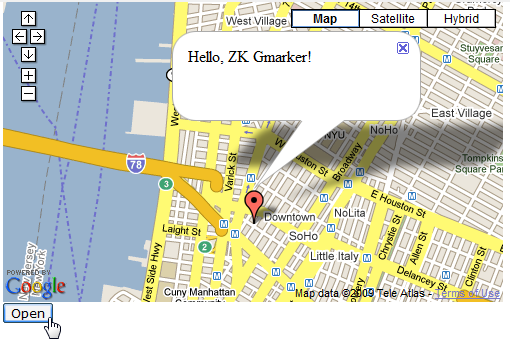
GMarker allows you to marks a position on the map. Its usage is simple, simply specify its location, and embed it into gmaps component as follows,
<gmaps width="500px" height="300px"
showSmallCtrl="true"
showTypeCtrl="true" zoom="14"
lat="40.72254287" lng="-74.003777504">

	<gmarker id="mk" lat="40.72254287" lng="-74.003777504"
		draggable="true" >
		<attribute name="content">
			Hello, ZK Gmarker!
		</attribute>
	</gmarker>

</gmaps>
<button label="Open" onClick="mk.setOpen(true)"/>

Multiple Gmarkers are allowed in a gmaps component.
Gpolyline
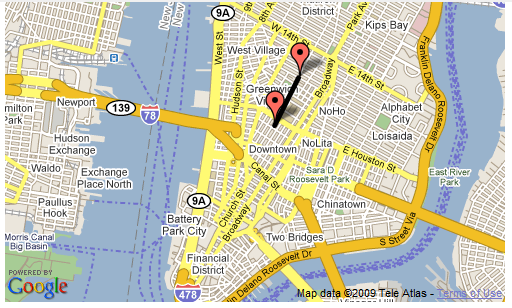
Gpolyline allows you to draw on Google Maps. You have to specify two locations to points property to make them become vertex of Gpolyline, and you shall see a line on the Gooogle Maps as follows,
    <gmaps id="mp" width="500px" height="300px" lat="40.72254287" lng="-74.003777504" zoom="13">
        <gmarker id="mk1" lat="40.726120478" lng="-74.0003871918"/>
        <gmarker id="mk2" lat="40.7323645693" lng="-73.9962673187"/>
        <gpolyline color="#000000" opacity="100" points="${mk1.lat},${mk1.lng},3,${mk2.lat},${mk2.lng},3" />
    </gmaps>


